About Me

My photo
It's All About the Baking came about because I want to share my Gluten-free baking. I've developed recipes and tricks over the past ten years so I could enjoy old favorites that tasted, well, just like the old favorites! Hundreds of experiments and tastings (including and especially friends who can eat gluten) later, I'm ready to share!

Thursday, September 10, 2015

Fail!

It happens to everyone. You make an old favorite, a standard recipe, and it doesn't work. What? I just took a Zucocoa cake out of the oven and had to laugh. It failed! It fell! I don't think I've had quite this thing happen. I've gone over my ingredients and can't figure out where I went wrong. I get everything out before I begin the baking process and put each item away once I've used it. Well, I misjudged something because the cake doesn't have a mind of it's own. Did I forget the baking soda or baking powder? Did I mismeasure the flour?

I suspect that last one is probably it. I was in a hurry. I've had a busy day and was baking for a gathering this evening. And I'm running
on very little sleep. Still, I'm experienced at this.

Perhaps it's meant to be Zucocoa Brownies?
I'm going to taste it, and if it's passable, will glaze it with ganache.

Stay tuned for an update!

Sunday, September 6, 2015

Peach Muffins, or The Most Delicious Peach Muffins Ever

Right out of the oven!
I wish that I could claim divine inspiration for these muffins, but inspiration came from Smitten Kitchen's post for Perfect Blueberry Muffins. With a few changes, these became The Most Delicious Peach Muffins. Ever. (Ask the co-diner if you doubt.)
Peaches are in season here in Michigan as September begins, and blueberries are not. I had some peaches reaching their peak of ripeness on my kitchen counter and had been dreaming of eating a sweet treat with a cup of tea. Within and hour we were happily enjoying both.

Preheat your oven to 375 degrees; grease or use paper muffin liners for ten muffins.

Dice and set aside two medium peaches or about 1 cup
Lovely ripe, diced, peaches

Sift or stir together:
1 1/2 cups GF flour or flour mix*
1 1/2 tsp baking powder
1/2 tsp baking soda
1/2 tsp salt
1/2 tsp xanathan or guar gum*

Peachy, creamy batter
Cream together with an electric mixer:
5 TB softened (not melted) butter
3/4 cup sugar
Add and beat in:
1 egg
3/4 cup yogurt (full fat preferred) or sour cream
3 TB half and half or milk

Stir the diced peaches into the dry ingredients, then fold in the wet ingredients scraping bottom and sides of bowl. The batter should be quite thick at this point. (This is where I let mine rest for 15 minutes or so which allows for the GF flour to absorb the moisture and will produce a better rise.) But you don't have to wait. 

Divide the dough/batter among the ten muffin cups and bake for 25 to 30 minutes, checking at the 25 minute mark.   

Cool slightly before eating. If there are any muffins left, slip them into a zipper bag or air-tight container and refrigerate. The moisture from the fresh fruit could cause the muffins to ferment or even grow mold. These are good ingredients; you don't want them to go to waste.

*Notes:
-My favorite flour mix is the one I put together with the recipe from America's Test Kitchen Gluten-free Cookbook.
-My rice flour of choice is from Anson Mills, which I buy online. You can't go wrong with any of their products. All of there products that are naturally gluten free, are milled or processed separately.
-Guar or xanthan gum: if you don't have either of these, just omit. Your muffin wil be more delecate but will be as delicious. You may use a tablespoonof soaked flax seen instead, or a tablespoon of psyllium seed husk power.


Friday, June 12, 2015

Scones. Flaky, Tender, Wonderful!

I love scones. Years ago, before Celiac disease, over the course of several months I worked on a scone recipe that I considered worthy, not just good for a "gluten-free" scone. Overwhelmed with Gluten-free baking, too many bad recipes and the availability (at the time) of inferior flours and mixes, I gave up the idea that a good, Gluten-free scone was even possible. As new versions of rice flour appeared on the market, I began experimenting with biscuits first. After all, they had been a staple in my baking for my family. Even as kids, my sisters and I were happy when our mom ran out of bread for breakfast toast because it meant a batch of warm, butter-smothered biscuits. Of course I had to reproduce them for my family, and that recipe was the beginning and basis for my scones. The GF buscuits we now eat are second to none, and the scones come in on top, too.

This recipe is one of three scone recipes I'll be offering. These are a little more dense and moist than my original version, and perfectly match one version of scones that some of my friends prefer. Next I'll publish my first, favorite version, and then the recipe of my friend, Richard's mother, who is Scotish and a school baker and nutritionist in Scotland.

The temps are were the low 70s the day I made these, a perfect day for warm scones and tea after the previous day's high temp of 90 degrees. They have a subtle lemon flavor but I'll write substitutions in case you don't like lemon. And believe it or not, some people do not! Ah, well, we all have our flaws.

I used the flour blend recipe* from America's Test Kitchen Gluten-free cookbook with my favorite rice flour from Anson Mills. I recommend buying this cookbook (it's on sale!). And please go to the Anson Mills website for beautiful photos, wonderful products, and unique recipes and ideas.

Preheat oven to 450 degrees
Recipe makes eight, good-sized scones
I never eat two
but I did today!

The Recipe
Sift together:
2 cups or 9 ounces of GF flour
1/4 cup sugar
4 tsp baking powder
1/2 tsp baking soda
1 tsp psyllium seed husk powder**
1 tsp xanthan or guar gum
1/2 tsp salt

Cutting in the butter
Into above flour mixture cut:**
3 TB cold butter (cut into 1/4 inch pieces)
2 TB shortening OR 5 TB butter or shortening

Then stir into this flour/butter mixture:
grated zest of one lemon**
3/4 C chopped pecans

Measured yogurt
Stir together:
1 slightly beaten, large egg
3/4 C whole milk yogurt
2 tsp lemon juice** (4 tsp for more lemon flavor) and 1 tsp vanilla extract, optional.

Pour the combined liquid ingreients into the dry mixture,
folding and cutting together with a silicone spatula. If you feel the dough is too dry (it will be thick and slightly crumbly) drizzle in whole milk or half and half a tablespoon at a time.

Once combined, cover bowl with plastic wrap or a plate and let rest for 30 minutes at room temp to give the flour time to absorb liquid ingredients and fats.

A pan in a pan
Next you'll need two baking sheets, placing one inside the other. This will prevent the bottom of the scones from getting too dark. Place a piece of parchment paper in the top pan and turn dough out onto the paper. Lightly pat out the dough into roughly an 8 inch circle.

With very sharp knife, cut the dough into eight wedges, pulling them apart slightly so they bake evenly. This will be a bit tedious as the dough will be soft. It's easier and just as lovely to drop the dough by spoon fulls leaving a bit of space between scones. Admittedly, my cutting wedges was an experiment that worked OK. I'll probably go back to just dropping them.
Dough patteted
into a round
Cutting into wedges


Bake in preheated, 450 degree oven for about 17 minutes. The tops will get well browned but check for doneness by pushing lightly on top. Best not to underbake! Let sit for a couple of minutes then finish cooling on a wire rack

Enjoy warm with a cup of tea or coffee, or glass of cold milk.

*ATK flour blend:
24 ounces (4 1/2 cups plus 1/3 cup white rice flour
7 1/2 ounces (1 2/3 cups) brown rice flour
7 ounces (3/4 cup) potato starch
3/4 ounce (3 TB) nonfat milk powder
If you want to understand the science behind why this works, please buy the ATK cookbook. Having said that, I use only Anson Mills Carolina Gold Rice Flour for both types of rice flour in this formula. This is a wonderful company and deserves supporting and this flour makes the absolutely best baked goods.

**If you don't have the psylliium, use and extra 1/2 tsp gum
**Use a pastry cutter, two knives, or food processor, which is the easiest.
**If you'd rather have pain vanilla instead of lemon scones, omit the lemon juice and use white vinegar or rice wine vinegar, and omit the grated zest of the lemon.

Saturday, May 23, 2015

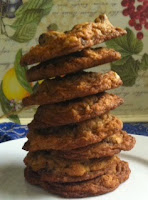
Chocolate Chip Oatmeal Cookies, Take 2

When I made these fabulous cookies I knew I'd remake them after tweaking the recipe. These are flat, not thick and soft, cookies, They are chewy in the middle and crispy-chewy around the edges. Sometimes I like a cookie that's softer in the middle and thought that decreasing the butter was the solution. Turns out, this time, I was right. (There will soon be a post about learning from your/my mistakes.)

I eliminated one tablespoon of butter and got the result I was looking for. I don't think I'll experiment with this further, but if you like an even softer cookie, I'd cut two tablespoons from the original recipe. I'm offering a re-do of the the recipe with these changes already included.
ready for chillin'

I also left out the dried cherries and added toasted, chopped  walnuts. The walnuts are great even without toasting, but fabulous with toasting!
One for the oven

Ingredients:
15 tablespoons unsalted butter, softened at room temperature (14 TB for softer cookie)
3/4 cup light brown sugar, lightly packed
3/4 cup cane sugar
2 extra large eggs warmed to room temp*
1 tsp vanilla extract

1 3/4 cup sorghum flour or your favorite gluten-free flour/mix
Chocolate chipper
1 teaspon baking soda
1 tsp salt
1/2 tsp xanthan gum
2 tsp psyllium seed husk powder*

1 1/4 Cups rolled oats
Chipped Chocolate
12 ounces bittersweet chocolate, chopped*
3/4 cup toasted walnuts chopped*

Method:
Sift or whisk the dry ingredients together and set aside.

Cream the butter and sugars together in a large bowl, just till blended. Add in the eggs and vanilla and combine thoroughly. Don't over beat as you don't want to incorporate too much air in the dough, especially with gluten-free flour.

Lovely ingredients
Thoroughly mix in the sifted dry ingredients, scraping bottom and sides of the bowl; a stand mixer with a paddle makes is easiest, but you an use a wooden spoon. Add the oats, chips, and cherries. If you're not already mixing by hand you may need to switch to incorporate these three ingredients. (I love my Kitchen Aid six-quart mixer because it will handle this!)

Tightly cover the dough, chill at least two hours and preferably over night to allow the flour and oats to absorb the moist ingredients. If you skip this rest, the cookies will spread out and burn around the edges while remaining raw in the center. I know because I tried it.

Preheat the oven to 375 degrees, drop dough by spoon fulls* onto a cookie sheet lined with parchment or a Silpat mat. Bake for 10 to 12 minutes, until cookies are nicely browned on the edges and the centers are set.

Cool on wire racks, store left-overs in a tightly covered container.
Perfect!


*Notes
-I used eggs from my local farmer's market, one tiny one and one jumbo one!
Warm chocolate goodness
-If you want to omit the psyllium husk powder, increase xanthan gum to 1 3/4 tsp.
-A 1 3/4 inch cookie scoop is too big. Either use a smaller scoop or just use a generous teaspoon full.
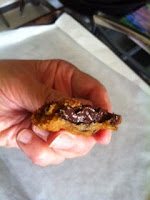
-While you can sub in a bag of chocolate chips, you can see from the photos the large pockets of chocolate you get from chopping your own. I start the chopping process with the Chocolate Chipper (afailable at King Arthur, online) and finish the process with a large chef's knife.
Melted chocolate chunk!


Tuesday, May 5, 2015

Zucocoa Cake

Cooling
Recently, in clearing out the fridge while preparing to leave on a short vacation, I had two, lonely zucchini that had not made it onto a dinner menu. Since I was having several friends for a quick dinner gathering, I thought Zucocoa cake would be the perfect dessert.

This recipe began as a sheet-cake recipe from a friend who described it as an old, hippie recipe. I changed the ratio of flour and cocoa to make it a true cocoa cake. You could add chopped nuts or even chopped, dried cherries, but I prefer it just the way it is.

For this gathering I glazed the cake with dark-chocolate ganache. It's such a delicious way to top off a cake, though this cake is perfectly fine plain, and even makes a better breakfast pastry without the glaze.

If you're sharing with someone who is averse to vegetables, peel the zucchini first to remove any evidence green and shred it so the vegetable melts into the cake.

Though I have not done it, I think this recipe would work in two medium loaf pans or a 9x13 sheet pan. Adjust baking time if using a sheet pan; it will take a few minutes longer to completely bake in the center.

UPDATE! I'm including photos of shredded zucchini because it's easier to shred than to chop finely into uniform pieces. That's about all the updating, Enjoy!

Notes*

Grease and flour (I use cocoa instead of flour) a Bundt pan. Set aside.
Greased pan, floured with cocoa
Preheat oven to 350 degrees

Sift together:
2 1/4 cups flour (I used sorghum, use your favorite GF flour or flour blend)
1/2 c cocoa
1 1/2 tsp xanthan or guar gum or 1 TB psyllium seed husk powder
1 1/2 tsp baking powder
1/2 tsp baking soda
1/2 tsp salt
1 tsp cinnamon
1/2 tsp ground cloves


Finely chopped zucchini
Process and reserve 2 cup finely chopped zucchini or 1 3/4 cup shredded zucchini, (blotted with a towel if you've shredded it ) to remove some moisture.*

Cream together without over beating:
1/2 cup butter, softened to room temp
1/2 cup shortening (I use Spectrum organic; 96 grams equals 1/2 cup if you have a scale)
1 3/4 cups sugar
Add and mix thoroughly:
2 large eggs
1/2 cup soured, whole milk,* buttermilk, or yogurt thinned with milk or water
1 tsp vanilla extract

Mix or stir the dry ingredients into the butter/egg/milk mixture, stopping to scrape down the sides and bottom of the bowl two or three times.
Stir the chopped or shredded zucchini into the batter. Spoon the batter into the prepared Bundt pan.

Bake for 50 to 60 minutes (checking at 50 minutes) depending on your oven.


Cool in the pan for ten minutes, then invert onto a cooling rack.
Cool completely before serving.

Glaze, from Epicurious:
1/2 cup whipping cream
1/2 cup corn syrup, preferably dark
9 ounces of bittersweet or semisweet chocolate, finely chopped
In a small saucepan, over medium heat, bring the whipping cream and corn syrup to a simmer but not a boil. Pour over the chopped chocolate and whisk until combined. Glazing works best if you can chill the cake thoroughly first. Not everyone can make room in their fridge, but the glaze won't slide off the cake if it's cold. If there's no room in the fridge, scoop up the glaze with each slice and enjoy!


*Shredding the zucchini will give you a more moist, denser cake.
*To make sour milk put 2 tsp vinegar (white or cider) into a measuring cup and fill to half cup with whole milk. Let sit for a few minutes.
*The Kitchen offers a great tutorial for ganache. For a quick glaze, chop 3 ounces of bittersweet chocolate and put in a bowl. Heat 1/2 cup cream (I got away with half and half, all I had at the time) till it just begins to simmer. Pour over chopped chocolate, let it stand till chocolate is soft, and stir or whisk to blend. To make it thinner, add warm cream a little at a time. Drizzle over completely cooled cake.
Shredded, draining on towel
Lovely batter


The shredded zucchini makes a smoother, slightly creamier, batter. It's just a great cake either way.

Sunday, April 26, 2015

Brie and Jam Muffins


If you only ever make one recipe from my collection, this should be it. When I bit into this warm, decadent muffin, I knew it was a winner. Sweet and salty, flavors of both the jam and the cheese distinct, all I wanted was another. And another. Reviews from co-diners were positive. I'm keeping myself from baking another batch today because I'll just want to eat them. It's best to make a batch and share with friends, they're  delicious with a pot of Darjeeling tea. (And they reheat beautifully, too, 325 degree oven for ten minutes..)
If you want me to convert the recipe to wheat flour, leave a comment and I'll post the changes.

Sift or stir together and set aside:
1 3/4 cups sorghum flour
1/3 cup sugar
2 tsp baking powder
1/2 tsp baking soda
1/2 tsp salt
3/4 tsp xanthan gum
1/8 tsp ground nutmeg, optional

Combine:
2 large eggs, lightly beaten
3/4 c plain, whole-milk yogurt
1/3 cup vegetable oil or melted butter
Brie in batter
1 tsp vanilla extract

Reserve:
Apricot jam
Cold brie cut into approximately 3/8 inch chunks. You'll need a dozen pieces, one for each muffin.

Make a well in the dry ingredients. Stir the liquid ingredients into the dry ingredients, combining thoroughly, scraping down the bottom and sides of bowl. Cover the bowl with a plate and let rest for half an hour. This allows the flour to absorb the moisture and the muffins will rise better.
Jam and brie in batter

Stir the batter down. Fill ten muffin cups about 1/3 full, then push a chunk of brie into the each portion of batter. Spoon a scant teaspoon of jam on top of the cheese. Divide the rest of the batter between the cups to top the muffins, making sure to seal the cheese and jam as completely as possible. (Otherwise it will run out of the muffin.) Bake at 400 degrees for 20 - 25 minutes, mine were done at 23. Some of the filling will inevitably leak out; it's fine, the muffins will still be perfect.
Hot out of the oven, a bit of jam
has leaked and burned on the
pan. It's just fine!


Saturday, April 11, 2015

Fruit Crunch


Ready to serve
When I was little my mother had a friend who was about the right age to be her mother. Her name was Alice and we called her Auntie Alice, or more specifically, "Annie" Alice. I didn't realize it then but she was an unusual and amazing woman. She was vegetarian though we didn't know that word. We just knew she didn't eat any animals. In the winter she would ignore the mice in her dining room claiming that they had to eat, too. Deer grazed in front of her little cabin where she let the apples fall from the tree for them. She invited me to spend the night once when I was about six and we foraged for dinner; we found mushrooms, watercress, berries, and something that I always thought was milkweed pod, which was floured and fried in butter. I don't remember if it was the right time of year to pick milkweed pods but don't know what else they could have been. It was an unforgettable evening, from walking in the woods behind her little house, picking watercress by the stream, to smelling the mushrooms frying up in butter. We had the berries with cream and sugar, then watched the deer family quietly graze in front of the house.
For the topping

This recipe came from her. I've never shared it with anyone before. I'm sure it's something old fashioned and common yet I've never seen it served other than in our family. It's not a fruit "crisp." There are no oats or nuts in it. While baking, it forms a lumpy, hard, top crust with a soft, cakey layer underneath. It's heaven in a baking dish. And there was no time for a nice photo of it plated; another time!

 I used frozen peaches which were delicious but don't don't hold up well as far as texture is concerned. My mom always made it with apple slices and I will say that it's my favorite. But fresh peaches blanketed by this buttery goodness are wonderful, too. Or fresh, Michigan, sour cherries!

This version is specifically for gluten-free flour. If you need the gluten-full version, leave a comment. You may be the first person I share that version with!

Fruit Ingredients: About
3 pounds of apples or peaches, 7 or 8 of either, sliced into approximate quarters. If you use cherries or berries, I'd use about 1 1/2 times the amount you'd need for a pie. Combine fruit with
1/2 to 1 cup of sugar and about
1 1/2 Tb corn starch.
These are not precise amounts but should be a good starting point. (And I always say that if you have good ingredients you'll have a delicious, if imperfect, dessert. If it's soupy, vanilla ice cream saves the day.)

Grease or butter a 9x13 pan or one of equivalent size. The oval baker pictured just fits inside my 9x13 pan. You can always add a few more slices or pluck them out. You want the pan full since the fruit will cook down.

Topping:
Stirring dry ingredients
3/4 cup of your favorite GF flour. I use sorghum for this. It's a healthy flour and only adds to the flavor.
3/4 cup sugar
1 1/2 tsp baking powder
1/2 tsp xanthan gum or guar gum
1/2 tsp salt
1 large egg
6 TB melted butter
cinnamon-sugar
The "crumble"

Put the fruit that has been tossed with the sugar and cornstarch in the baking dish. (I usually bake this naked fruit mixture half an hour or so until hot through out and then pull it out of the oven and finish.)

Stir together the dry ingredients.
Break the egg into the dry ingredients and stir with a fork to combine. It will be crumbly. Use your hands if you don't mind getting messy.

Sprinkle the dry ingredient/egg mixture over the fruit. Drizzle the melted butter over the top. If using a slightly smaller baking dish, reduce the butter a bit. Sprinkle the cinnamon sugar over the topping.

Bake at 350 degrees for about 35-40 minutes, longer if you haven't pre-baked the fruit. This is best eaten the same day. Let it cool, at least a bit, before serving. Oh, I also made home made vanilla ice cream. Enough said.
Grandma's recipe
Almost ready for the oven


Friday, April 3, 2015

Mexican Chocolate Brownies

 
 I'm taking dessert to an Easter Sunday potluck. One co-diner prefers fruit desserts and another, chocolate. These brownies are for the chocolate lover. They have a hint of cinnamon and cayenne pepper, and just a little espresso powder to deepen the flavor. We'll eat them with home-made vanilla ice cream; does it get better than this?

please see notes at end

Melt together in top of a double boiler:
8 TB unsalted butter
4 ounces unsweetened chocolate
1 tsp espresso powder dissolved in 1 TB boiling water

Whisk to combine above ingredients, cool until comfortable to the touch.
When cool, stir in:
1 cup sugar
2 large eggs, beaten

Sift together:
Whisking eggs and sugar into cooled
chocolate mixture
2/3 cup your favorite GF flour (I just used sorghum flour)
1 1/2 tsp baking powder
1 tsp xanthan gum
1/2 tsp salt
1/2 to 1 tsp cinnamon
cayenne pepper, from a pinch to 1/8 tsp, or more if you're brave

1/2 cup toasted pecans, chopped

Add the nuts to the dry ingredients. Stir the dry ingredients into the chocolate mixture, combining thoroughly.
Toasting the pecans
Pour into a greased and floured (I dust with cocoa powder instead of flour) 8 inch square baking pan, smooth the top, and bake at 350 for 25 minutes. Check sooner than that, don't over bake. Cool completely before serving. I know, this is hard, but they really are better when cool. And I've found that the flavor develops after a few hours. They'll be good tomorrow, too!

I added 1/2 cup of toasted, chopped pecans. Walnuts would be great but I was out. Best when eaten fresh, they won't last long anyway!
Cooling; patience!


notes:  You  may omit the cinnamon and cayenne if you wish and make a traditional brownie. Nuts are also optional. You may skip toasting the nuts but I like the subtle difference in flavor it makes.
If you want a non-GF version of these brownies, leave a comment and I'll post the instructions.